Sunday, April 6, 2014

Family Fun for $1

How much fun can a family of 4 have for a buck? Apparently a LOT.

The other day I was looking for some items to use in my eldest daughter's birthday goodies stash when I came across a $1 container of Glow Stick Bracelets. I grabbed a couple of tubes since I thought they might be fun for a backyard camp out or something. Little did I know the good times they would create for the entire family.

After bath time Saturday night, K saw the the tube of glow sticks and asked if she could see one. Sure, why not? So I pulled out a few of the sticks for both girls & turned out all the lights in their room. Flash forward 5 minutes and we had a toddler approved dance party in full force. We danced, had light saber battles, pretended they were energy bracelets for our super powers and the list goes on. It was definitely money well spent.


Good Times, Good Times... :-)

~Sharon

P.S. In case you're wondering what camera settings I used to capture the images. I used the following on my Canon DSLR. You may need to play around with your camera to see what works best for you.

Shutter Speed: 20 seconds
Aperture: F11
ISO: 1600
Focus: Manual (Find a Focus Point while the lights are on)

Sunday, February 9, 2014

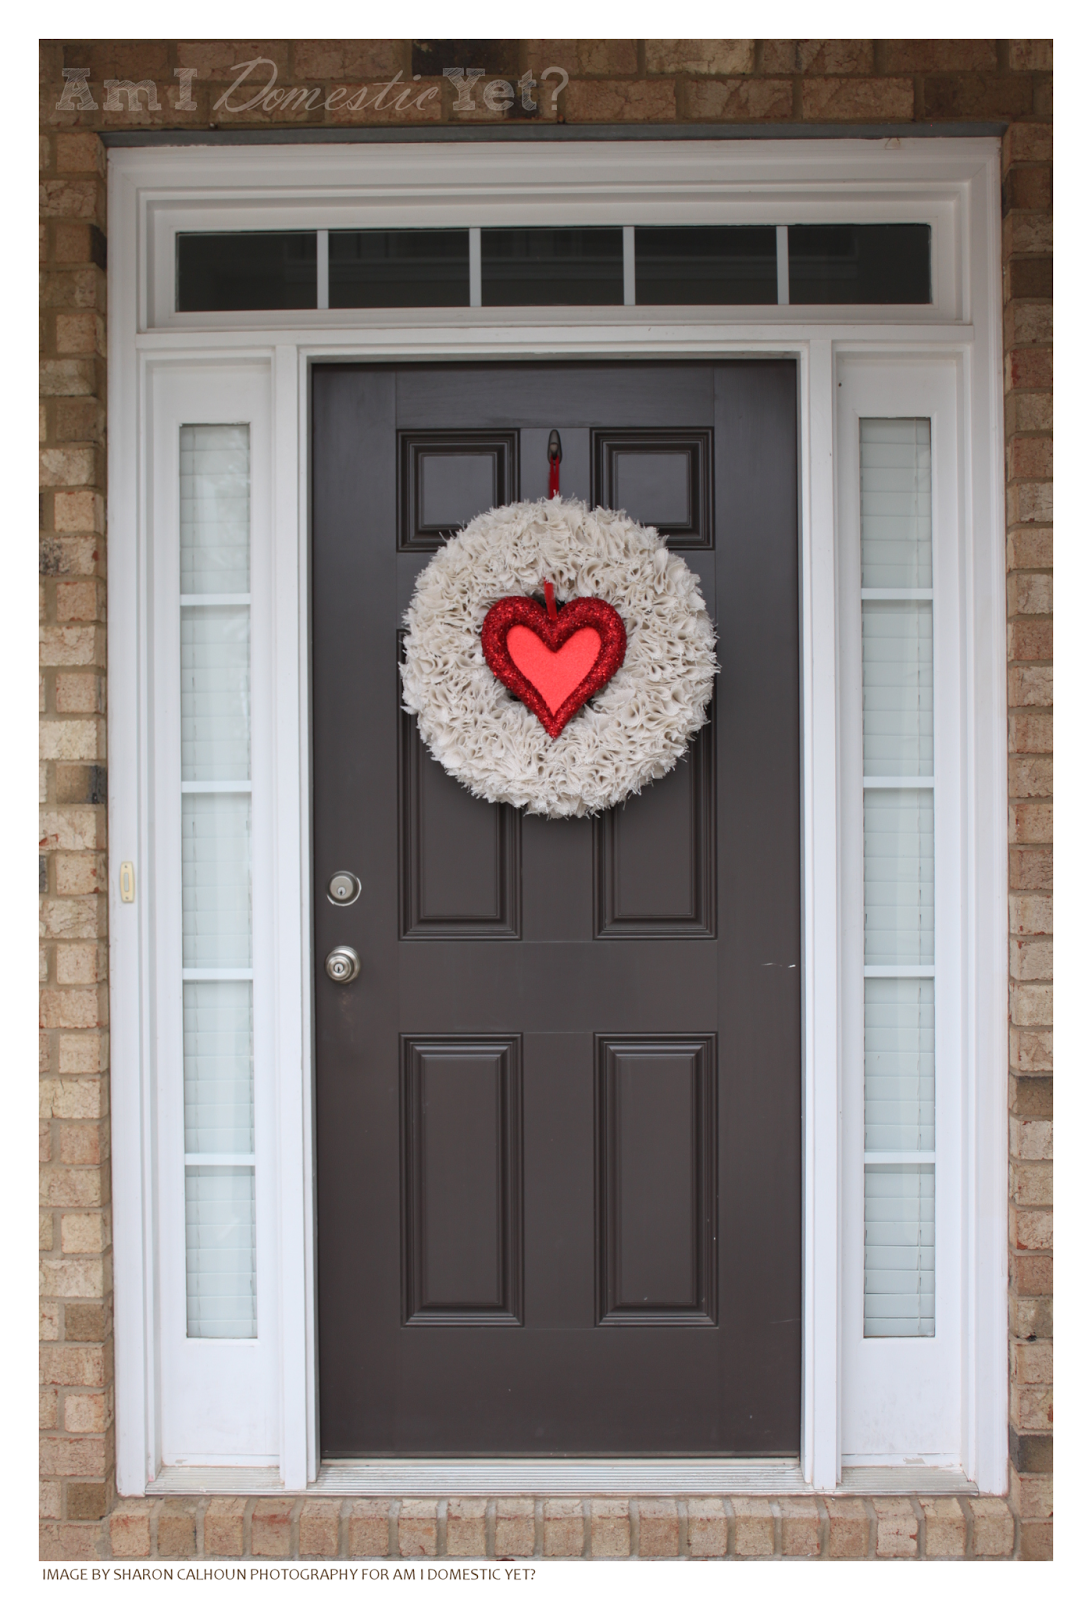
Winter White Valentine Wreath


If burlap were a person, I think it would have been punched in the face during this project. If you've ever cut a large or even small amount of burlap, you know exactly what I'm talking about.

Anyways, back in December 2013, I saw a very cool burlap wreath on Pinterest and decided that I was going to make a similar one for New Year's. I purchased the supplies below and got to creating the wreath after the girls had gone to bed. I GREATLY under estimated the effort it would take to make this wreath and I now totally understand why I see similar  wreaths on Etsy for $75-$100.

There is a lot of cutting & pinning involved in this type of wreath but in the end I LOVE the way it turned out and would do it again (but with a HAZMAT suit.) 

Wreath Supplies:

~ 16" Foam Wreath (I used the green one you can get at Hobby Lobby)
~ 575+ Stick Pins
~ 4 yards of burlap (I thought I would only need 3 but 4 ended up being barely enough)
~ 10" Heart (I found mine at Joann Fabric)
~ Ribbon for hanging the wreath
~ LOTS of patience


 1. Cut your fabric into 3x3 circles or squares.  I ending up using squares so that I didn't lose any fabric by cutting circles.


2. Fold the squares corner to corner so it looks like a triangle. Then fold it once more into a smaller triangle.

3. Next pin the folded corner into the wreath. Make sure to put the pin directly into the burlap thread so that it doesn't slip off the pin.


4. Now just continue pinning the folded burlap squares in alternating directions until you fill the wreath.

5. When the wreath is full, you can attach your heart if you want one or just leave it plain and lovely. I attached the heart by pinning the top of its ribbon into the foam wreath between the burlap.


Have Fun!

~Sharon

Monday, January 27, 2014

Homemade Caramel Corn


My oldest daughter and I made a batch of Caramel Corn today. It turned out really well and will definitely be a keeper for our family recipe book. You can find the recipe on Chow.com.

Enjoy! :-)

~Sharon

Tuesday, January 14, 2014

Pantry Makeover: Part 1

After a year or so of pinning all kinds of neat ideas for making my house & life more organized, I finally picked a project to tackle for 2014.

Following Thrifty Decor Chick's pantry post, I removed my 12" wire shelves and replaced them with 20" melamine boards and I now have a TON of space in my pantry…. Next step is to organize the actual items into jars & containers.


Note to self: NEVER format your camera's memory card unless you're 1000% sure you transferred all the photos of your recent pantry makeover project. With that said, all the before and progress pics from my DSLR are gone. Luckily, I did take a couple on my phone when I was adding the supports.

Items I used for this project:

DryDex Spackling

Sandpaper, 120 grit
Paint, Pale Honey by Behr in Satin Finish
Melamine Board 3/4" x 49" x 97" (Home Depot)
Shelf Edging or Iron On Edge - White Melamine (Home Depot)
Primed Finger Joint Board 1" x 2" x 8" (Home Depot)
Liquid Nails (Home Depot)
Drywall Screws
Finish Nails
Level

What I did:

1. Removed the original wire shelves. It took me a bit to figure out how to remove the wall clips since the tops did not have Flat or Phillips head slots. I tried using pliers but the nail heads were too low in the clip and I couldn't get a grip. I was going to try yanking the entire clip out but I knew that might end in disaster.  I ended up using a pair of needle nosed pliers to pull out the pin and once it was out, the clips slid out the wall with very little effort.


2. I filled all the huge holes that the wall clips left behind with spackling.  I like the DryDex kind because it goes on pink and turns white when it's dry. After the spackling was dry, I sanded down the spots with 120 grit sandpaper.


3. I used Heavy Duty primer to cover spots on the walls where a bottle of olive oil spilled. Once the primer dried, I painted the ceiling and walls. I could have gotten away with just painting the walls but I noticed that the builder painted the ceiling and walls the same color so I decided to do the same.  The space is only 3'x3' so painting the ceiling was no big deal.


4. After all the paint was dry, I measured and screwed in the cut finger joint boards that would act as support for the shelves. I used my laser level to insure that the boards were straight. I also pre-drilled the holes in the boards to make sure they didn't split when I screwed in the drywall screws.


5. The edging should be added to the melamine boards before setting the boards on the the supports. I totally forgot to add my edging until the end and it was a pain.

6. Last, I added a few liquid nail dots to the supports then nailed the melamine boards down.

Overall, this was a surprisingly easy project and could have been done in a weekend but it took me a few extra days because my kiddos keep me running. :-)

~Sharon

Tuesday, January 7, 2014

Blueberry-Banana-Oat Smoothie

This grainy cell pic doesn't do the yumminess justice

Blueberry-Banana-Oat Smoothie
Adapted from Martha Stewart

1/4 cup quick oats*
1 banana, cut into thirds**
1/4 cup blueberries**
1 cup fat-free milk or soy milk
2 teaspoons honey
1/4 teaspoon ground cinnamon

In a blender, combine oats, banana, blueberries, milk, honey, and cinnamon; puree until smooth. Serve immediately.

* You can bump the oats up to 1/3 cup for a thicker smoothie. I use Quaker Quick Oats because they blend a little smoother.
**I freeze my bananas and blueberries because I like iciness in my smoothies. :-)


Tuesday, April 23, 2013

Yummy Summer Salad

As I attempt to make healthier decisions in what I eat, I've been saving every salad recipe I can find. Although I've always loved a good salad, I never really tried making one at home.  Well, I never tried making one that didn't consist of only iceberg lettuce and a splash of whatever ready made dressing that was on hand.

Recently, I found a rather scrumptious looking salad on my favorite place for internet hoarding... Pinterest. It's a Summertime Chopped Salad by Sweet Tooth Love. The original recipe called for chicken and bacon but I left those out because I've been limiting my meats. I know what you're thinking, limiting bacon is like limiting oxygen! But it tis what it tis. :-) Also, I took a shortcut and used a bag of Fresh Express Sweet Butter salad mix in place of the butter lettuce called for in the recipe.


Summertime Chopped Salad (modified)
Ingredients
  • 2 1/1 cups butter lettuce, chopped (I took a shortcut and used a bag of Fresh Express Sweet Butter salad mix)
  • 2 ears oven roasted corn, cut off the cob
  • 1/2 cup grape tomatoes, quartered
  • 2/3 cup blueberries
  • 1 avocado, chopped
  • 1/3 cup crumbled feta
  • 1/4 teaspoon salt
  • 1/4 teaspoon pepper
  • 2 tablespoons lime juice
  • 1 1/2 teaspoons honey
  • 2/3 teaspoon red wine vinegar
Instructions
  1. In a large bowl, mix together lettuce, corn, chicken, avocado, blueberries, tomatoes, and feta. Sprinkle with salt and pepper then toss thoroughly.
  2. In a small bowl, whisk together lime juice, honey, and vinegar. Pour over salad, then toss.

Tuesday, April 16, 2013

Sew What?: I made a skirt

I finally had the chance to sew something from the Alexander Henry "Mocca" fabric that I bought from Joann Fabric a while ago. My original plan was to make a full dress but after cutting out the 1800 pattern pieces, I realized that I should probably start with something simple. Thankfully, I came across this blog post on Pinterest. It's by Dana Willard of MADE. Below are my progress pictures for sewing a skirt for my 3 year old.

I won't even pretend to be an instructor when it comes to sewing so if you want the steps for making this simple elastic waist skirt, definitely check out Dana's website at DanaMadeIt.com. :-)

My daughter hamming it up in her new skirt.